
This is my spot to share my life and loves.
Thursday, October 3, 2013


Tuesday, August 13, 2013


Tuesday, September 25, 2012


Sunday, July 8, 2012
Pinterest + Food = Happy (Healthy) Cook
I am a food blog addict. I love them. I spend hours (really, hours) trawling through Pinterest's food section, happily pinning meals I would like to make. There are many items that I pin that I most likely would never make. Some items I like the look of but I consider to be heart attack in a mouthful such as Brownie, Oreo & Choc Chip Cookie Slice, and the burger patty that if mozzarella filled, then wrapped with bacon and grilled.
However I have actually become more inspired to cook healthier food, rather than junk. There are just so many recipes out there that celebrate healthy eating. I have been introduced to a world of recipes that aim to create healthy, nutritious meals that are also tasty.
I thought I would share with you my top 10 recipes. These are recipes that I have either tried already, or am waiting to try. I hope they inspire you as much as they do me.
1) Individual Baked Oatmeal

These look great. I have discovered a whole new world of breakfast ideas, many of them featuring oats! These look great, and even better that they can be made ahead, frozen, then reheated for a quick, healthy brekkie.
2) Chicken Rollatini with Spinach

I have made these many times. This is a beautiful dish, that tastes just as good the next day. They are also great to serve if you have guests. The website skinnytaste.com is just amazing. Gina shares simple recipes that you just want to try for the look alone.
3) Cranberry and Avocado Salad with Candied Spiced Almonds and Sweet White Balsamic Vinaigrette

I am dying to make this salad. It just sounds amazing! I think this would be a real 'wow' salad to bring out to a summer bbq.
4) Quinoa Tortilla

I am starting to make the switch to wholegrain bread/pasta/rice etc. I have not really eaten white bread for a while now. However I am starting to replace ALL white processed foods with less processed foods. Quinoa is not actually a grain, it is a seed. It is really helthy, low in carbs and high in protein. I want to make the recipe as I think fresh homemade tortillas would be lovely.
5) Chocolate Fudge Pie (with Tofu!)

I have actually made this pie. I was just so intrigued by the use of tofu! I quite liked the pie, I did taste a hint of 'tofu' flavour but I used milk chocolate. Next time I plan on making this using dark chocolate as I believe the stronger chocolate taste would mask the tofu flavour further. This is great to make as a much healthier treat. I also love the website. Katie is a Vegan, who has also cut out sugar from her diet, however still wanted to have 'chocolate' in her life. Her recipes are mainly for sweets, but contain no sugar, and often no dairy. Well worth a look at some of the amazing sweets she makes.
I hope these recipes inspire you as much as they have inspired me. If you try one please let me know what you thought of it. Even better if you have come across a 'to die for' healthy recipe you want to share.
However I have actually become more inspired to cook healthier food, rather than junk. There are just so many recipes out there that celebrate healthy eating. I have been introduced to a world of recipes that aim to create healthy, nutritious meals that are also tasty.
I thought I would share with you my top 10 recipes. These are recipes that I have either tried already, or am waiting to try. I hope they inspire you as much as they do me.
1) Individual Baked Oatmeal

These look great. I have discovered a whole new world of breakfast ideas, many of them featuring oats! These look great, and even better that they can be made ahead, frozen, then reheated for a quick, healthy brekkie.
2) Chicken Rollatini with Spinach
I have made these many times. This is a beautiful dish, that tastes just as good the next day. They are also great to serve if you have guests. The website skinnytaste.com is just amazing. Gina shares simple recipes that you just want to try for the look alone.
3) Cranberry and Avocado Salad with Candied Spiced Almonds and Sweet White Balsamic Vinaigrette
I am dying to make this salad. It just sounds amazing! I think this would be a real 'wow' salad to bring out to a summer bbq.
4) Quinoa Tortilla
5) Chocolate Fudge Pie (with Tofu!)
I have actually made this pie. I was just so intrigued by the use of tofu! I quite liked the pie, I did taste a hint of 'tofu' flavour but I used milk chocolate. Next time I plan on making this using dark chocolate as I believe the stronger chocolate taste would mask the tofu flavour further. This is great to make as a much healthier treat. I also love the website. Katie is a Vegan, who has also cut out sugar from her diet, however still wanted to have 'chocolate' in her life. Her recipes are mainly for sweets, but contain no sugar, and often no dairy. Well worth a look at some of the amazing sweets she makes.
I hope these recipes inspire you as much as they have inspired me. If you try one please let me know what you thought of it. Even better if you have come across a 'to die for' healthy recipe you want to share.
Thursday, June 28, 2012
Winter Dressing

This is my favourite winter outfit at the moment. I have the dress, from City Chic. It is a beautiful dress that really flatters me. It hides all the lumps and bumps, cinches in at the waist, and is so feminine. The dress has a floral print with dark brown, reds and greys in it.
As the weather has been bitterly cold I wear it with black leggings, flat knee high boots and a long grey cardigan. I tie the belt that comes with the dress over the top so in cinches in my waist. I will also be able to wear this dres during summer, and I especially like the flared cap sleeves and the peek of lace at the shoulders.
I love wearing dresses with boots and leggings during winter. They are pretty, comfortable and flattering for the plus size figure.
What is your 'go to' outfit?
Tuesday, June 19, 2012
Breathless
The other night my little girl was starting to get sick. In the middle of the night she woke wailing. Not her usual 'Wake up and get me my milk' cry, it was a 'I want my Mummy' one.
I went in and tried to soothe her but anytime I went to leave she stood up, eyes half closed with her arms out, sobbing. I went back in and picked her up, carrying her back to my bed.
Once in bed she snuggled on top of my chest. Attempts to shift her (11 kg!) body were met with more cries.
On my chest she slept.
Head tucked under my chin
Ear pressed to my heart listening to it beat
Arms wrapped around my torso
Feet brushing the tops of my thighs
I fell asleep with my arms and heart full, breathless from the the beautiful gift that I have been given.
and maybe also because of the 11kg weight that was pushing the air out of my lungs...
I went in and tried to soothe her but anytime I went to leave she stood up, eyes half closed with her arms out, sobbing. I went back in and picked her up, carrying her back to my bed.
Once in bed she snuggled on top of my chest. Attempts to shift her (11 kg!) body were met with more cries.
On my chest she slept.
Head tucked under my chin
Ear pressed to my heart listening to it beat
Arms wrapped around my torso
Feet brushing the tops of my thighs
I fell asleep with my arms and heart full, breathless from the the beautiful gift that I have been given.
Friday, June 8, 2012
Recipe - Boiled Milk Buttercream
After extolling the virtues of the Boiled Milk Buttercream I thought I should share the recipe. This recipe makes enough to cover a cake, and fill one layer. To create the ruffle cake I doubled the recipe.
 You can flavour the recipe a number of ways. You can either add flavouring when making the boiled milk, or add it when adding to the butter.
I have made this recipe a few times since. One time I replaced milk with coconut milk and added some lime zest to make a coconut and lime frosting. It was divine!
I have also added melted chocolate to the milk when boiling it. Although I found I needed to add more flour to get the mixture to thicken.
It is important you wait for the boiled milk mixture to go cold before you add it to the butter, otherwise you will cause the butter to melt, making the mixture too runny. Although if this happens you could always put it in the fridge to firm up, then beat again.
Buttercream made with milk does need to be refridgerated
Put the milk, Sugar and Flour in a saucepan. Stir the ingredients, making sure the flour mixes in without clumps. Bring the mixture to boil. Stir it until it thickens. Keep letting it boil and stir until it goes thick like pudding ( or like Clag glue!).
Let the mixture cool.
Add the mixture to the butter. Beat until the mixture is combined and fliffy. ( I use the whisk attachment on my beater).
It is now ready to pipe onto cupcakes or spread into cakes
Enjoy!
 You can flavour the recipe a number of ways. You can either add flavouring when making the boiled milk, or add it when adding to the butter.
 Boiled Milk Buttercream
- 1 Cup Milk
- 1 Cup Sugar
- 2 Tablespoon Plain Flour
- 1 Cup Butter - RoomTemperture
Saturday, June 2, 2012
A First Birthday Tea Party - The Cake
In recent years I have begun to dabble in cake decorating. I have always admired people who were artistic. I have never been a very good drawer or painter. However I have discovered that I am good at cake decorating. I am by no means an expert, this is simply a hobby. What it has given me is a new found respect for cake decorators and the many hours and skill that goes into creating a beautiful cake.
For Abbie's birthday I spent a long time looking around trying to decide what cake I wanted. Did I want to make a teapot? Something with a little figurine on top? I looked at lots of different designs, but I kept coming back to the ruffle cake that has been doing the rounds on the Internet.
I usually make fondant covered cakes. However I decided a pretty pink ruffle buttercream cake would be perfect for a first birthday. Especially given that I was making all the other desserts.
I then had to decide what buttercream recipe I would used. I have experimented with many different kids and had a selection of recipes to choose from. However I kept finding faults with them all.
Normal Buttercream - Too sweet and sometimes a bit grainy
Cream Cheese Buttercream - Too rich
Swiss Meringue Buttercream - This uses raw egg whites. Although they do get heated up to a bacteria killing temperature I still prefer not to use this for a child's cake
I went in search for a silky, sweet but not too sweet buttercream. I was delighted to come across a blog that spoke about a boiled milk buttercream. It is made by making a pudding like mixture with boiled milk, sugar and flour, cooling it, then beating it into butter. The result is a smooth, cream like buttercream that is not too sweet or buttery and can adapt well to flavouring.
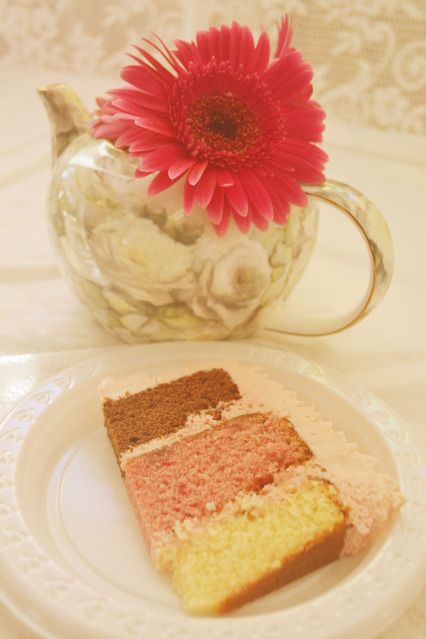
For Abbie's cake I made a Neapolitan cake, with a vanilla, strawberry and chocolate layer. I then made the boiled milk buttercream. However I used strawberry milk! I added a simple fondant flower and number 1 topper for decoration.
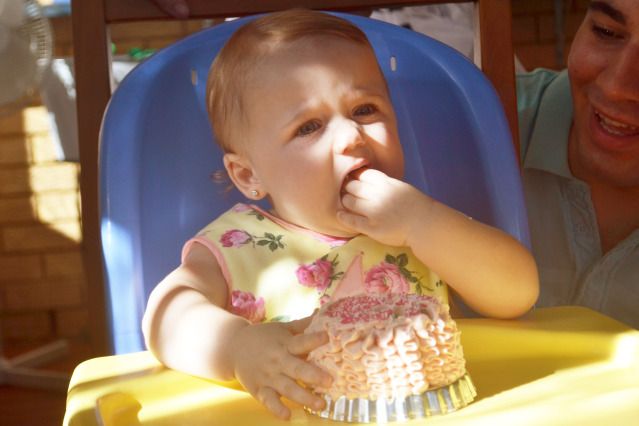
I also made a 'smash' cake, which is a miniature cake that is just for the birthday child to smash into and eat!
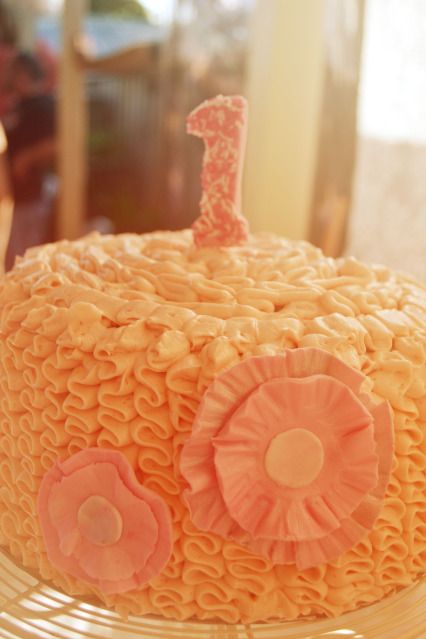
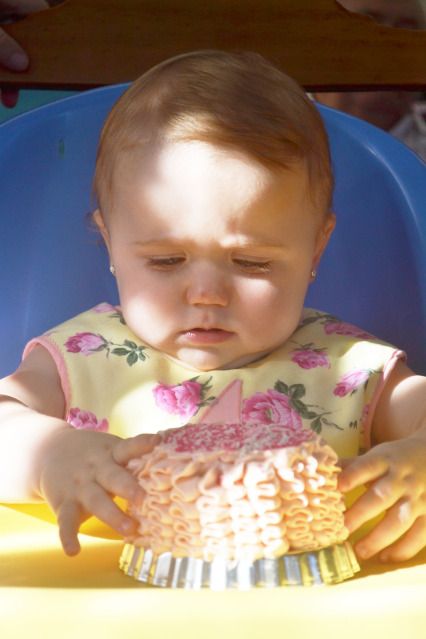
The Verdict? I will let the photos speak for themselves
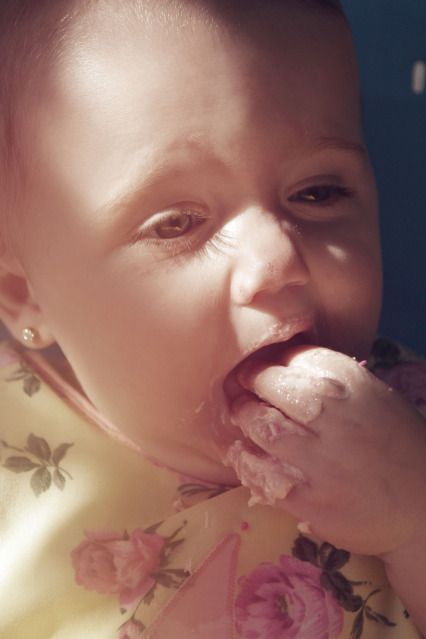
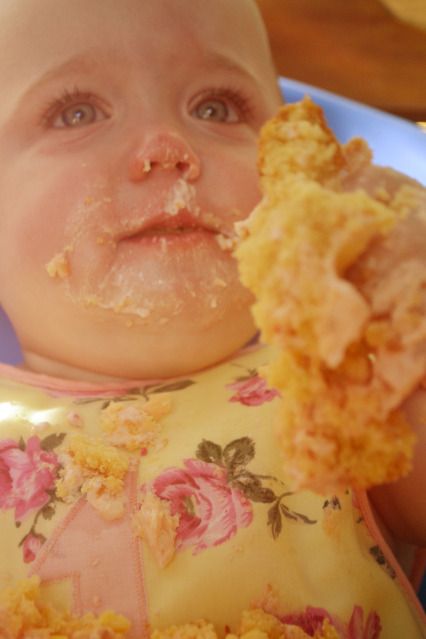
Tuesday, May 29, 2012
A First Birthday Tea Party - The Food
I love to cook. One of the most exciting parts of throwing a party is deciding on the menu. Once I settled on having a tea party I started brainstorming what food I was going to serve.
I wanted a mix of savoury and sweet, and I wanted it to be single serve food. I often make food single serving for parties as I find it is less messy. There is nothing worse than being the person that is left with the scrapings at the bottom of a bowl. With single serve food you know everyong gets a serving, and it is all of the same quality. It is also great to pack away at the end of the party. I don't like being left with a lot of leftover food at the end of a party so I always send people home with a little 'doggie bag'.
I tend to over cater on sweets because that is what I love to eat. However my Mum and Sister convinced me to serve more than just sandwiches for savoury food. I am lucky I did because all the savoury food when very quickly.
The Menu I decided on was
- Finger Sandwiches - Chicken and herb, Cucumber and cream cheese, Creamy Egg
- Mini Quiche - Spinach, Lorraine and Roast Vegetable
- Meatballs - Served with a tomato sauce
- Scones, Jam and Cream
- Berry Cheesecake
- Chocolate Mousse
- Lemon Tarts
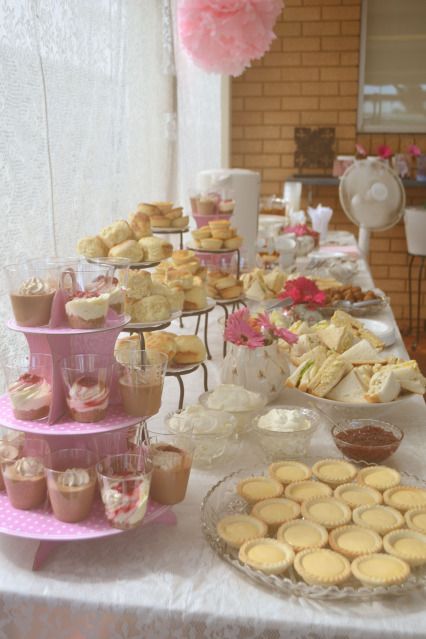
I bought the mini quiche and the meatballs so I could focus on the other food. My sister made the sandwiches, and my Mum made the scones. The desserts I made myself. I looked arond and different recipes and found ones that were simple, and that did not have to be cooked. They were all mix and chill type recipes. This was great as I was able to prep them all very quickly and have them in the fridge ready to serve.
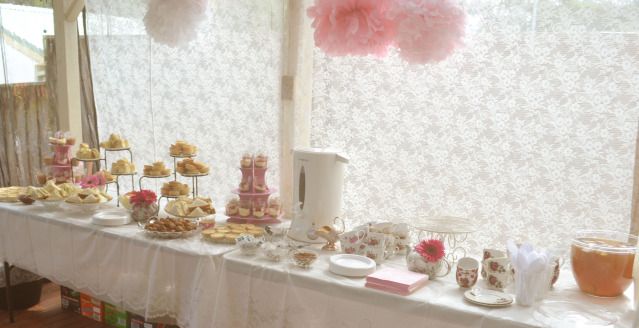
Setting up the food table was lots of fun. I was able to put all of my own cake stands, crystal bowls and platters to good use. Everything I used I already owned except for the pink spotted towers. Those I bought on sale for $2 each. I also had a beverage table where I set out a urn of boiled water, tea cups and tea/coffee. We also had some iced tea and soft drinks. It ended u being quite a hot day so we were glad we brought the cold drinks.
I decorated the table with some pretty tea pots I owned filled with flowers. They were really simple, but added some colour to the table.
I also had a table with some treats for the kids on them. I was making sure that I had healthy options for the kids and babies. For the kids and babies I served
Banana and Blueberry muffins - Sugar free
Fruit cut into flower shapes - Rockmelon, Watermelon anf Honeydew melon
Jelly cups - Natural colours and no preservatives (From Aldi)
Fairy Bread
Cookie Pops - Chocolate Chip cookies with smarties on a stick
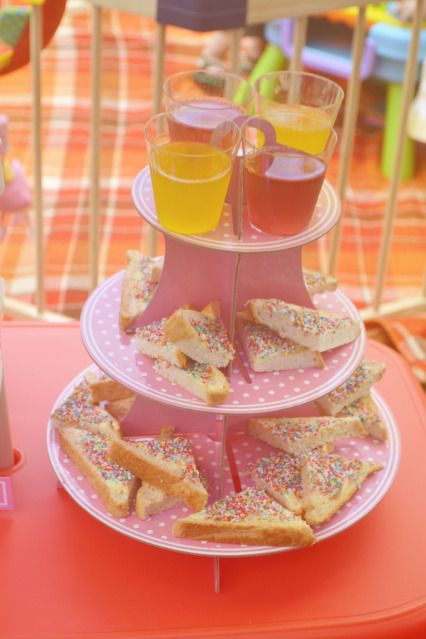
The best part about the food was that it was all made ahead of time and was set up just as guests started to arrive. This way there was food that was ready to eat as soon as they arrived, and I was also able to enjoy the party.
Sunday, May 27, 2012
A First Birthday Tea Party - The decorations
My daughter turned 1 at the end of March. I am one of those people that loves to throw a party. I love to cook the food, plan the decorations and make as much as possible myself. I had been planning what kind of party I would have from the moment Abigail was born. My love of all things party has only been exasperated by the discovery of Pinterest!
I knew that I wanted a very girly theme. I decided on an afternoon tea party. This would be a good way to work around the little lady's nap time, as well as keeping it casual and simple. I figured that all the food could be made ahead of time so that I would not spend the whole party prepping and serving food. I wanted something that allowed me to enjoy the day with family, friends, and of course, the Birthday Girl.
Having a tea party would also mean I was able to put my collection of tea cups and crystal ware to good use. I didn't want to spend a lot of money on decorations. I wanted to be able to use what I had as much as possible.

For invitations I had grand plans to design and print my own invites. I did design them, however my laptop 'died' before I was able to get them printed. By the time I reordered Adobe Photoshop and redesigned them I was running out of time to get them printed and sent out. Instead I ended up making an event page on Facebook. We were lucky that everyone except great grandparents had Facebook accounts, and used them often. While this is not what I had planned, it worked well. I made the event page graphic the invite I had designed and had all the information on the event page. It actually was a very efficient way to get the information for the party out, and also keep track of who was coming. I kept it private so only those invited could see the event. Even better was the cost involved $0!
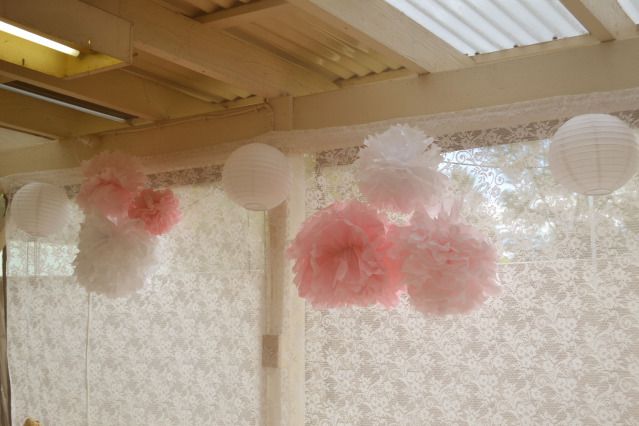
I kept the decoration fairly simple. I had my Mum make me a bunch of tissue paper pom poms that I had been coveting on Pinterest. Each pom pom used a packet of $1 tissue paper. All up I think we spent about $15 on tissue paper to make the pom poms. I also hung paper lanterns that I had left over from another party a few years ago. The 'backdrop' for the food table was an old lace curtain that I had kept from when we moved into our home. I was also lucky enough to have white plastic tablecloths with a lace design leftover from my baby shower.

We hired some white plastic chairs so we had enough seating scattered around our (small) backyard. This cost about $30 to hire, but it was worth it knowing that we had enough seating for people if they wished to sit down. We also set up our playpen with toys for the babies, and kids tables with games for the older kids.
I made party bags for all the kids at the party. I found cheap white 'popcorn cups' at a local discount shop. They were $2 for 8. I also had purchased the number 1 cards from there ($2). I had planned on using them in a banner, but found they looked really good on the front of the party bags.

I had different items for the babies and for the older kids. For the older kids I had a balloon, a container of bubbles ($3 for 6) , a little pot of playdough ($3 for 8). I also added in a decorated sugar cookie. For the babies I had a balloon, a sugar cookies (for Mum) and a pop up book ($2). All up I only spent about $3 per party bag. The older kids really loved playing with their bubbles through the day. I liked being able to give something useful to the kids and the babies.
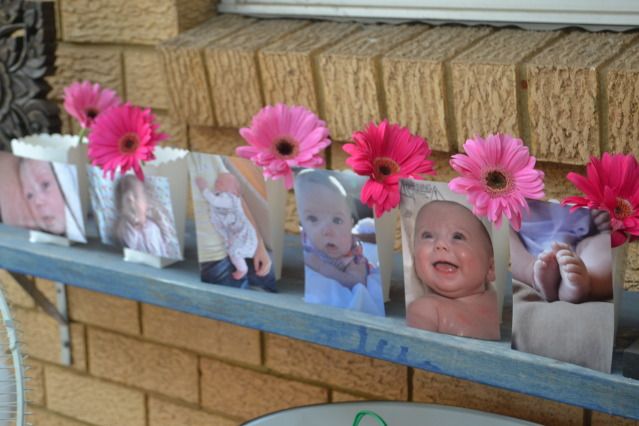
I also had the obligatory photograph timeline celebrating my Daughter's first year. I used left over white boxes and attached photos to the front. I then put a glass into each with some water and put a flower into each. It was really simple but added a nice personal touch. The photos I printed myself on the home printer.

When everything was set it it looked really lovely. Everyone commented on how pretty it all looked when they entered.
Using what you already have and checking local discount stores can help you achieve a great looking party for very little cost. Do you have any cost saving decoration tips?
I knew that I wanted a very girly theme. I decided on an afternoon tea party. This would be a good way to work around the little lady's nap time, as well as keeping it casual and simple. I figured that all the food could be made ahead of time so that I would not spend the whole party prepping and serving food. I wanted something that allowed me to enjoy the day with family, friends, and of course, the Birthday Girl.
Having a tea party would also mean I was able to put my collection of tea cups and crystal ware to good use. I didn't want to spend a lot of money on decorations. I wanted to be able to use what I had as much as possible.
For invitations I had grand plans to design and print my own invites. I did design them, however my laptop 'died' before I was able to get them printed. By the time I reordered Adobe Photoshop and redesigned them I was running out of time to get them printed and sent out. Instead I ended up making an event page on Facebook. We were lucky that everyone except great grandparents had Facebook accounts, and used them often. While this is not what I had planned, it worked well. I made the event page graphic the invite I had designed and had all the information on the event page. It actually was a very efficient way to get the information for the party out, and also keep track of who was coming. I kept it private so only those invited could see the event. Even better was the cost involved $0!
I kept the decoration fairly simple. I had my Mum make me a bunch of tissue paper pom poms that I had been coveting on Pinterest. Each pom pom used a packet of $1 tissue paper. All up I think we spent about $15 on tissue paper to make the pom poms. I also hung paper lanterns that I had left over from another party a few years ago. The 'backdrop' for the food table was an old lace curtain that I had kept from when we moved into our home. I was also lucky enough to have white plastic tablecloths with a lace design leftover from my baby shower.
We hired some white plastic chairs so we had enough seating scattered around our (small) backyard. This cost about $30 to hire, but it was worth it knowing that we had enough seating for people if they wished to sit down. We also set up our playpen with toys for the babies, and kids tables with games for the older kids.
I made party bags for all the kids at the party. I found cheap white 'popcorn cups' at a local discount shop. They were $2 for 8. I also had purchased the number 1 cards from there ($2). I had planned on using them in a banner, but found they looked really good on the front of the party bags.
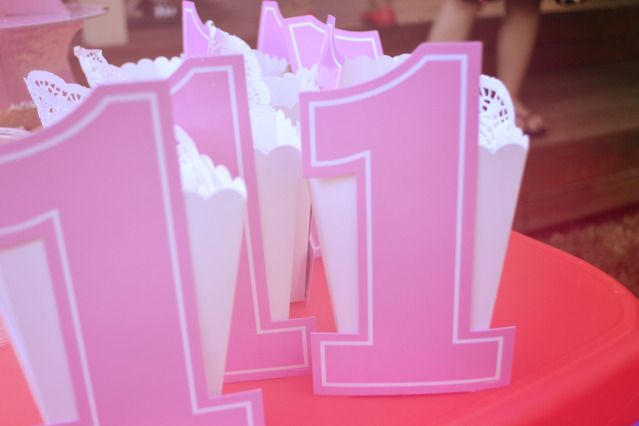
I had different items for the babies and for the older kids. For the older kids I had a balloon, a container of bubbles ($3 for 6) , a little pot of playdough ($3 for 8). I also added in a decorated sugar cookie. For the babies I had a balloon, a sugar cookies (for Mum) and a pop up book ($2). All up I only spent about $3 per party bag. The older kids really loved playing with their bubbles through the day. I liked being able to give something useful to the kids and the babies.
I also had the obligatory photograph timeline celebrating my Daughter's first year. I used left over white boxes and attached photos to the front. I then put a glass into each with some water and put a flower into each. It was really simple but added a nice personal touch. The photos I printed myself on the home printer.
When everything was set it it looked really lovely. Everyone commented on how pretty it all looked when they entered.
Using what you already have and checking local discount stores can help you achieve a great looking party for very little cost. Do you have any cost saving decoration tips?
Subscribe to:
Posts (Atom)